As a Salesforce Admin, ensuring that emails sent from Salesforce reach their intended recipients is critical for smooth communication and operations. Sometimes, Users or customers report not receiving emails, and understanding why this happens requires investigation. Salesforce’s detailed Email Logs are a good starting point.
In this blog, we will walk you through how Salesforce Admins can use Salesforce Email Logs to investigate whether emails have been successfully delivered and explore alternative approaches to keeping Users informed about Record updates.
Organisations like sending automated emails from Salesforce to Users or customers to update them on changes for several key reasons.
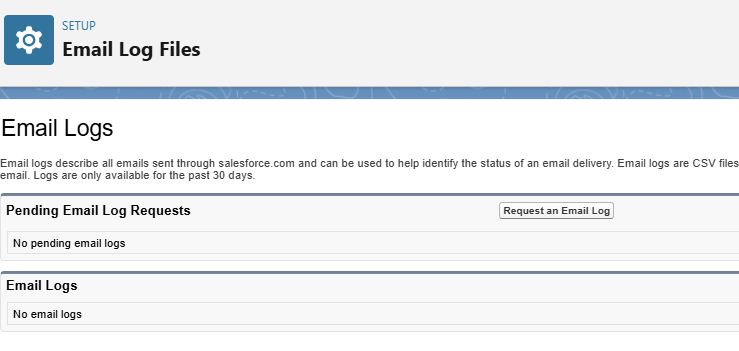
A Salesforce ‘Email Log’ is a log of every email sent through the Salesforce platform in the last 30 days, presented in a CSV file. For each email sent, information is captured, including the sender, recipient, date and time, delivery status, and any associated error codes.
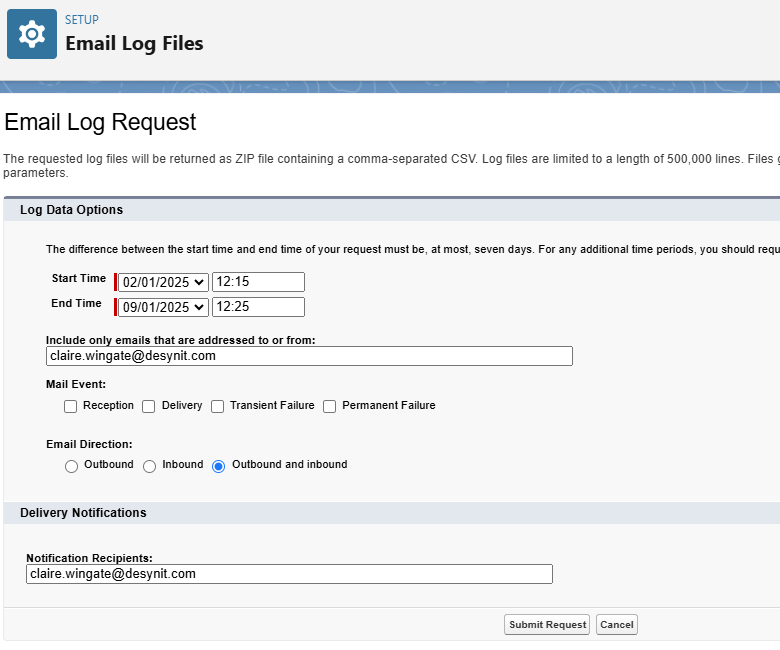
Before requesting an email log in Salesforce, there are several important considerations to take into account to ensure you get the most accurate and useful data for troubleshooting or monitoring email activity.
Here are the key factors to keep in mind:

| Column | Key Field Values and Formats | Example |
| C | Mail Event (R, D, T, P) see above for description of terms | D |
| O | Delivery Status Notification
After every delivery stage, a three-digit response code is sent from the mail server. The first number indicates whether the command was successful or unsuccessful; the second digit indicates the type of error; and the third provides additional information to resolve the potential problem. |
1xx – Positive Preliminary reply
2xx – Positive Completion reply 3xx – Positive Intermediate reply 4xx – Transient Negative Completion reply 5xx – Permanent Negative Completion reply “421 no adequate servers” |
| R | Email Direction | “Inbound” or “Outbound” |
| U | SPF Status (Sender Policy Framework) authentication status.
An email validation to detect email spoofing. Verifies which providers can send emails on your behalf with the aim of reducing spam and fraud. Pass Fail None |
Pass |
| V | Sender ID Status
Pass Fail None |
Fail |
| W | Sender ID PRA (Purported Responsible Address) status
Salesforce uses the Sender Policy Framework to verify which providers can send emails on its behalf. Pass Fail None |
None |
| AB | DKIM Success (Domain Keys Identified Mail) – DKIM digitally signs emails sent from Salesforce to ensure they are not amended in transport
True (email headers included DKIM signature header) False (email headers do not include DKIM signature header) None (either the DKIM Domain or DKIM Selector wasn’t available.) |
True |
If your org has a DKIM key set up to prove the ownership of the domain, you can bypass the need to check if a User’s email has been verified by checking “Verify the ownership of email sending domains by DKIM keys” which can be found in the “Deliverability” settings.
If this setting is not enabled and a User has not verified their email address, their emails will not be sent from Salesforce.
There are several alternatives to automating emails for notifying users about Record changes in Salesforce. While automated emails are one of the most common methods, you can leverage other Salesforce features and tools that provide flexibility and real-time notifications without relying solely on email. Here are some alternatives:
| Description | Advantages | |
| Chatter Notifications | Chatter is a collaboration tool with functionality that enables users to follow records and receive notifications when changes to a Record occur in real time. | You can set up Chatter Feeds on records so that users are notified directly within Salesforce when there’s a status change.
Email inboxes do not become clogged up. |
| In-App Notifications | In-App Notifications allows Users to receive notifications directly in the Salesforce interface
Admins can configure In-App Notifications to alert Users when the status of a Record changes, with these notifications appearing on the Salesforce home page, in the notification bell, or as a pop-up. |
Eliminates email overload.
Keeps users within the Salesforce platform, improving productivity. Immediate and visible alerts in the Salesforce UI. |
| Reports, Dashboards, List Views | Instead of sending individual notifications, you can set up Reports, List Views or Dashboards that display Records at a specific stage(s). | Provides a holistic view of Opportunity statuses, not just individual updates.
This is an important move from a reactive to a proactive approach to managing work. Users can use List Views/Reports & Dashboards as their ‘go to’ reference point. Helps users stay updated on their overall pipeline without requiring email notifications. |
| Custom Salesforce Alerts Using Flows | Flows can be set up to notify Users via various channels, such as In-App Pop-Ups or Task creation when a Record is updated. | Flexible, no need for emails.
Customisable User Experience within Salesforce. Allows for automated tasks and actions alongside notifications. |
Automated email notifications have many advantages in terms of efficiency and time-saving, accuracy, and standardisation in real time. However, in contrast, clogged inboxes and the risk of emails not being delivered are important considerations when recommending the optimum solution for notifications to internal Users.
Depending on your organisation’s needs and User preferences, tools like Chatter, Custom Alerts, In-App Notifications, Tasks, and Reports/Dashboards/List Views offer different ways to keep users informed in real time without relying on email. By exploring these alternatives, you can improve engagement, reduce inbox clutter, and streamline communication within Salesforce.
If you do decide to automate emails and there is concern that emails have not been received, email logs are an excellent way to troubleshoot any deliverability issues. Email logs are a goldmine of information and they provide detailed insights into the entire lifecycle of an email, from when it’s sent to its final delivery status.